
Click to Call
Free module to call contacts from your VitalPBX extension. Setup, account enablement and everyday use.
Last updated: 2026-09-23
What it does and what it costs
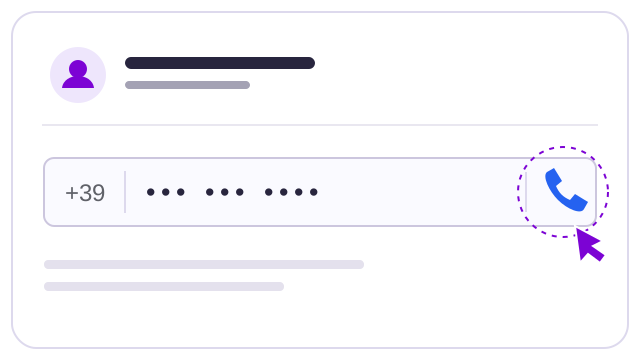
Click to Call starts a call from the phone icon next to a telephone contact in the management application. The PBX rings your extension first; after you answer, it calls the recipient and connects you when they answer.
The module is free: €0/month. The ISP remains responsible for the PBX, telephone service and any call charges. Request confirmation does not mean that the recipient has already answered.
Supported PBXs and new integrations
Only VitalPBX is currently supported. For other brands, request an integration and provide the PBX brand, model, version and any manufacturer documentation. We will evaluate the request and implement it if technically feasible; compatibility is not guaranteed before assessment.
You need VitalPBX reachable from the application through a public IPv4 address or a hostname resolving to one, an application key dedicated to your company, registered extensions and working outbound rules. Private-network-only PBXs and IPv6-only addresses are not currently supported.
Activation and access to Settings
A full administrator opens Settings → Communications and Support → Click to Call and selects Activate module. Free activation is immediate where the catalogue supports self-service. Distributor-managed environments retain their provider’s availability rules.
Open Settings on the same card to configure the PBX and extensions. There is no Click to Call entry in the sidebar. No dedicated operator role permissions are required: the administrator enables calling by assigning an extension.
Deactivate prevents the ISP from using the module and retains its configuration for future reactivation.
Prepare VitalPBX and enter the settings
- In VitalPBX, open Admin → Admin → Application Keys, create a dedicated key, select your company’s tenant, enable it and save. Retrieve the key from the saved entry.
- Check that each operator’s phone or softphone is registered and can already make calls from its extension.
- In Click to Call Settings, select VitalPBX, enter the PBX address and key. Enter a tenant only when required by your PBX configuration.
- Select the number format accepted by the PBX: keep +, replace it with 00, or remove it. The outbound prefix is optional; enter it only if the PBX requires one.
HTTPS with a valid certificate is recommended. For an HTTP-only PBX, use an address starting with http:// and enable Allow unencrypted HTTP connection: the key and telephone numbers travel without encryption. This option does not accept invalid HTTPS certificates.
A saved key is never displayed; leave the field blank to retain it. When changing the PBX address or tenant, enter the correct key again.
Verify the connection and enable calls
- Leave Enable calls for this ISP off and select Save settings.
- Select Verify saved connection. Verification does not place a call.
- Assign and save operator extensions.
- Turn on Enable calls for this ISP and save.
- With your own extension assigned, use an agreed test number in Make a test call. Answer your phone and check the connection to the recipient.
If connection details change, save with calls disabled and repeat verification before enabling calls again.
Extensions and account enablement
In Assign extensions to operators, find the account, enter its extension and select Save. A valid extension contains 1 to 12 digits; leading zeros are preserved. No additional switch or calling permission in the role is required.
Saving an extension enables the account. Clearing it and saving disables it. Example: assigning extension 201 to an operator rings their phone when they use the icon. To remove calling access, clear 201 and save.
Icons appear only when the account and ISP are active, the module is active, the connection is verified, calling is enabled and the account has a valid enabled extension. Reload any previously opened pages after a change.
Everyday use and expected issues
Select the phone icon next to a contact number; in telephone fields it sits at the right edge. Before starting the call, a confirmation displays the selected number and your extension: select Call to proceed or Cancel to close without calling. Confirmation also applies to DIDs and the test call in Settings. When the PBX accepts the request, a brief notification shows the extension being called, for example Starting call to extension 201…. It disappears automatically after a few seconds, without requiring OK. Answer your extension and wait for the recipient. Any errors appear in a dedicated message. In VoIP Management → DIDs, enabled accounts see the phone icon beside complete DIDs: clicking the number still opens its record, while the phone icon starts the call. GNR ranges containing asterisks do not show the phone icon. Icons apply to recognized telephone contacts in application screens, not every numeric sequence in arbitrary text.
- No icon: check the module, connection, calling enablement and saved extension, then reload the page.
- Connection failed: check the address, reachability, active key and tenant. For HTTP, also check explicit consent; for HTTPS, check the certificate.
- Request accepted but phone does not ring: check the assigned extension, phone registration and PBX configuration.
- The customer is not called: check number format, outbound prefix, permissions and telephone service availability on the PBX.
- Request just sent: wait at least 15 seconds and check the phone before retrying.
- Session expired: reload the page before repeating the action.
Good practices and checklist
- Use a key dedicated to your company and do not include it in support requests.
- Prefer HTTPS with a valid certificate.
- Assign each operator their own extension and remove it when they should no longer call.
- Verify the connection before enabling calls.
- Test with an agreed number and check your telephone service charges.
- If the outcome is uncertain, check the phone before clicking again.